Category Archives: Gardening

Apartment Gardening: Container Citrus Tree

Standard
IMG_0032

Citrus aurantifolia: Mexican lime, key lime, bartender’s lime

Living in an apartment after 17 years in rural Connecticut has been a bit of an adjustment.

The one thing that I miss the most (besides my dear friends), is my yard and garden beds. Of course, I miss the cacophony of birds singing, yelling and calling, and the lovely back roads, but I found a windy drive from Houston to Magnolia, Texas that meets my twisting, turning back road needs. What I haven’t had is a patch of soil just waiting for me to transform into a place for green, growing things. And now that I am living in the Houston area, I can garden all year long. Yay!!!

This past Saturday, my granddaughter and I drove the 25 minutes or so to Tomball, Texas to a wonderful garden center where we found herbs, flowers and my first container-grown citrus tree.

I chose Citrus aurantifolia as my first specimen because of the many uses for its extremely flavorful fruit. I grew up in Miami, and the first time I tasted key lime pie, I thought I had died and gone to heaven. When I was raising my young family in St. Petersburg, Florida, I made my first key lime pie from bottled lime juice. It was delicious, too.

What pushed me toward choosing this variety of citrus to grow is my love of tequila and lime together in a variety of ways. I make my own simple margarita-like drink which typically consists of my favorite tequila, lime juice (fresh squeezed is best), and a teensy bit of agave syrup (no more than a teaspoon). Sometimes I add equal measure of sparkling mineral water to make it an alcoholic soda. I don’t like salt, so a quick stir and I’m good to go.

Okay, I could talk about margaritas or what I pass off as margaritas for paragraphs. I even have a holiday margarita that is delicious which I will save for another time. Back to Mexican limes (which I will call them since I am now a few hours away from Mexico).

I also use lime juice for guacamole, limeade, tarts, cooking, drinking, and to give away. The woman who talked me into buying this variety said that they easily produce 40-50 limes. Although I am modifying my expectations because I plan to keep this tree smaller by root pruning after a few years, I fully expect a good harvest in a couple of years.

I also plan to purchase a Mandarin orange variety when my budget allows. It is on my gardening wish list.

Now, for those who also live in the Houston or Gulf Coast region, growing citrus is not without hazards.

The salesperson who assisted me had to ensure that I lived within the quarantine zone of the nursery due to citrus greening. Citrus cannot be brought into or taken out of two quarantine zones in Texas. I live in Harris County, so I cannot take my tree out of the quarantine zone that includes Fort Bend, Harris and Montgomery Counties. The other quarantine zone is located in the Valley which includes Cameron, Hidalgo and Willacy Counties.

A few years ago I would not have been able to purchase a citrus tree in this area at all; sales were halted in an effort to stop the spread of citrus greening.

With my purchase comes the responsibility of watching for signs of any diseases and/or pests that threaten the commercial citrus industry.

What I have learned, however, is that it is wise to never wait to plant a tree (or buy one). Fruit trees require time to grow large enough to produce fruit, sometimes 5 years or more. If you ever want to grow fruit in your yard or in a container, do your research and find a variety that thrives in the growing conditions that you have where you are.

Also, research, research, research. Read, talk to experts (many from different backgrounds — organic, conventional, etc.). Remember that your area’s extension agents are there for you. Your tax dollars pay their salaries, so don’t hesitate to tap that source.

My next posts will be about container herb gardening and gardening with my small children. Cuteness is guaranteed.


Monarch butterfly

Standard
monarch_butterfly_insect_danaus_plexippus_on_purple_flower

Photo credit: Rick L. Hansen, U.S. Fish and Wildlife Service. Wikimedia

Monarch butterflies have been in decline for years. As a result, backyard gardeners, butterfly lovers and environmentalists have been encouraging homeowners (and renters) to provide plants for Monarchs. I found the following graphic on Facebook and thought I would share it here:

16472989_1295313583895037_2400400925041215961_n

  1. Plant milkweed. It is important to locate seeds and plants that are native to your area. Very, very important.
  2. Encourage your locals schools and businesses to allow a Monarch-friendly patch of milkweed and other butterfly-friendly plants to thrive. Important: do not mow down plants until and unless they have gone to seed or died back naturally.
  3. No pesticides: my property is a pesticide-free zone. During the warm months, there are hundreds of insect species that stop by or live here including butterflies, bees, wasps (not all are bad), dragonflies, flies, and more.
  4. Share this information with others. If I had my way, pesticides would be banned from use by the general public and government entities.

More information: Journey North Monarch Butterfly project.

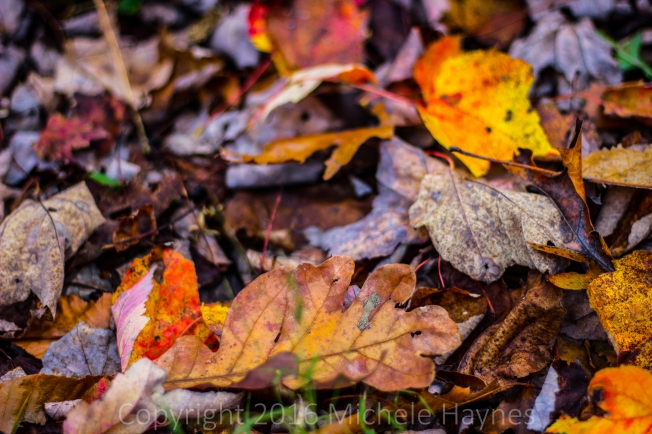
Don’t rake those leaves!

Standard

For years now we (that’s a royal we) have not raked leaves in the fall.

img_0226

Some years they were left in place untouched until spring due to my own health issues (nothing gets done around here unless I plan and organize the job). Some years, we did something a little different:

Mowed the leaves and left in place.

As a final mowing (my yard is mowed no more than 6 times each summer season), the yard is mowed chopping up the leaves. But even that is not recommended. It might be better to wait until spring to mow those leaves.

In his article Scientists Urge: Don’t Rake Your Leaves! – Here’s Why, David Wolfe cites the National Wildlife Federation’s recommendation that readers not rake up and throw away leaf litter. Here is Wolfe’s summary of the benefits of leaving leaves in place:

screenshot - David Wolfe, National Wildlife Foundation leaf litter benefits.PNG

Leaf litter provides habitat for creatures (small, smaller and smallest), nourishes the soil, and not raking keeps leaves out of landfills, reduces carbon emissions (no leaf blowers, please — hate those things), and gives you more time to do other things.

Les Harrison, UF/IFAS Wakulla County Extension Director, in Leaf Litter: Do the Benefits Outweigh the Work?,  discusses the benefits of allowing leaves to remain in place:

  • moisture retention from precipitation
  • stormwater runoff slowdown
  • availability of nutrients for organisms and soil as they are broken down

Although his article mentions the year-round drop of leaves in Florida, the science behind his recommendations apply to all parts of the country.

We do rake leaves off of the driveway because they are quite slippery and make it more difficult to remove snow in the winter months. But those leaves are raked into areas nearby beneath shrubs and trees so their nutrition is not lost to the environment.

img_0234

Rethinking fall chores is easy: just don’t rake those leaves!

Beautiful, edible landscape

Standard

Late spring and early summer in Connecticut can be just as lovely as the first blooms of spring. Most flowers in my yard have yet to open as the early fake spring that occurred in March seemed to actually delay the progression of flora in this region.

I have few blueberries forming, but more blossoms and buds on flowering plants that do not bear fruit. My pear tree has some fruit as well, but certainly fewer than previous years.

I have this partial shade-loving Kousa Dogwood (Cornus kousa) in my front yard, and this year it is completely covered in gorgeous flowers.

IMG_0440

Kousa Dogwood in front yard. Growing around the Kousa Dogwood are lowbush blueberry plants and Sassafras trees.

The white parts are bracts, not petals. The actual flowers emerge from the bumpy green center.

IMG_0410

Over the years, I removed most of the cultivars on my property, allowing the native plants to grow. But this small tree is too beautiful to destroy.

IMG_0413

Four white bracts are the background for the tiny flowers that will emerge before the fruit ripens into a beautiful red color.

The bumpy fruit from the Kousa Dogwood is listed as edible. I never thought to taste them. I might try to make jelly this fall.

The snow kisses the trees

Standard

What a wonderful, beautiful quote. Lewis Carroll knew. He just knew.

winter snow Lewis Carroll

Grow bags for tomatoes? Nope.

Standard

I wanted the title to this blog post to be: “Why grow bags are not the best choice for growing tomatoes.”
img_1259
I spent the past few years experimenting with the best ways to grow tomatoes.

I have grown tomatoes in raised beds, grow bags, plastic containers, and ground level garden areas. I grow indeterminate tomato varieties, so nothing I write here today is about my experiences growing determinate varieties. Not sure that is relevant, but I wanted to declare that up front.

Last year was an AHA! growing season for me because I discovered what I consider one the most important elements necessary for growing delicious tomatoes that do not crack: steady moisture levels.

I want to specifically address why I think grow bags are not a good choice for growing tomatoes.

I experimented with grow bags in different locations for two years. My grow bags are homemade and sewn from inexpensive landscape fabric. The grow bags that I placed in a warm, sunny location in my yard dried out very quickly. They needed daily watering, and even dried out too much during the day if temperatures were in the 80s.

Moskovich tomatoes ripening. These never cracked. Notice the moist soil. I never watered this side of the raised bed.

Moskovich tomatoes ripening. These never cracked. The occasional rain and spring below kept the soil consistently moist.


Last season, I planted my tomatoes in a variety of locations, but the one location where I had the healthiest tomatoes with no cracking at all was a raised bed in my backyard garden located directly above where a spring keeps the soil very moist. It wasn’t muddy, but the soil never dried out. The tomatoes that I grew in my front garden and in grow bags all had some cracking. The small cherry tomatoes in my front garden cracked the worst.
These tomatoes all cracked right before ripening due to dramatic soil moisture level changes.

These tomatoes all cracked right before ripening due to dramatic soil moisture level changes.


Tomatoes seem to do best with steady soil moisture levels. Dramatic changes in soil moisture stresses the plants which can result in diseases, etc. and can cause cracking. Cracking is bad because tomatoes are exposed to insects and can rot before ripening completely.

When tomatoes are ripening, the skin becomes softer and more delicate. Soil that dries out between waterings or doesn’t remain fairly moist means there is a quick uptake of moisture and water flows into the fruit causing cracking.

I did not get a single yellow pear cherry tomato last year that wasn’t cracked which means that the crop was mostly a loss. Even the red cherry tomatoes I grew cracked last year.

My recommendations:

Plant tomatoes in a rich, loamy soil with lots of organic matter incorporated for moisture retention in a container or bed that does not dry out quickly. Then, mulch. We don’t have an affordable source of mulch up here in Connecticut, so I rarely mulch my vegetable garden.

I also recommend a drip irrigation system. When I watered by hand, too much water was taken up by the plants too quickly. A drip irrigation system (which is really easy to set up — I still have components from my Florida drip system in the garage) will provide slower moisture which should prevent cracking and stressing the plants. I would probably water every morning (just the tomatoes — the rest of my vegetables had no problem with drier conditions — except the pumpkins).

Is there a use for grow bags? I honestly am not sure. They tend to dry out quickly. The felt grow bags (which I did not test) should dry out slower, but soil moisture evaporation is definitely fast in a grow bag. If grow bags are wrapped in something that would help prevent evaporation, that could help.

I really love the portable, impermanent nature of grow bags. It was so easy to build welded wire cages that not only support plants but protected the plants from creatures. The bags themselves were easy to sew, and the cost was minimal. The soil can then be returned to the compost pile, turned in, and replenished. The welded wire is reusable for years.

Thinking about starting seeds . . . it is so easy.

Thinking about starting seeds . . . it is so easy.


Additional stuff I learned about growing tomatoes:

  • Fruit won’t ripen if temperatures are too high – hotter climates should grow tomatoes in early spring and shade or protect summer tomato plants. Spring and fall is best for tomatoes.
  • Fruit will get eaten by slugs (and other creatures) if allowed to sprawl on the ground. Fencing is probably necessary. Keep chickens out.
  • Tomato plants brought home from a nursery or garden center can introduce pests, diseases and viruses. I had this happen and had to rip out a lot of plants year before last, bagging them up and sending them to a landfill (do not compost diseased tomato plants)
  • Starting tomato plants from seed is really easy and only requires a few weeks’ head start. So many more varieties to choose from, too.
  • Tomatoes grow just fine with less than 12 hours of sunlight, though they will need strong support since the plants will be leggier.

Grow bags in back yard garden had less drying out, but they were in the shade for hours every day.

Grow bags in back yard garden had less drying out, but they were in the shade for hours every day.


I still consider myself a tomato novice, but I am learning more every year. And just when I am figuring out how to grow vegetables in New England I am leaving. I will be moving back to Texas very soon.

Happy gardening, everyone!

New England Organic Garden: September update

Standard

These photos were taken the week ending September 28th (computer software issues prevented me from processing them sooner).

Mammoth sunflower plants that aren't, but pretty just the same.

Mammoth sunflower plants that aren’t because of long dry spells, but pretty just the same.


I remember as I was lamenting my very late garden this past spring that if only the weather stays warm longer than normal, I will get a harvest of tomatoes. Well, I was apparently feeling a bit prophetic. We have had warm weather with highs in the mid-60s, 70s and even 80s the past two weeks, and the weather forecast for the next week indicates temperatures in the mid-60s during the day.

I am harvesting and enjoying my late tomatoes very much. Moskovich is my absolute favorite for flavor, and I discovered the key to no cracking: steady water supply — not allowing the soil to dry out, ever. The raised bed were I grew Moskovich’s is above a natural spring which keeps that bed moist at all times. The tomatoes were thrilled. Next year, I will put together a drip irrigation system for my tomato plants set on a timer so that they remain uniformly moist at all times (because I practice crop rotation, I will not be planting tomatoes in that bed next year). No stressed plants, no rush of water for thirsty plants to quickly draw up, and no cracked tomatoes.

Moskovich tomatoes finally ripening. These two have since been harvested, ripened, and sliced for sandwiches. Yummy!

Moskovich tomatoes finally ripening. These two have since been harvested, ripened, and sliced for sandwiches. Yummy!

Mutt cherry tomato that was a volunteer in my front garden, a cross between Black Cherry and Yellow Pear cherry tomatoes. The taste of these little treasures is amazing! Again, yummy!

Mutt cherry tomato that was a volunteer in my front garden, a cross between Black Cherry and Yellow Pear cherry tomatoes. The taste of these little treasures is amazing! Again, yummy!

We had a week of decent rains and my pears plumped right up. They are juicy and oh, so sweet.  Crop was very small this year, though. Probably only 20 pounds total?

We had a week of decent rains and my pears plumped right up. They are juicy and oh, so sweet. Crop was very small this year, though. Probably only 20 pounds total?

Suyo Long cucumber filled with lots of mature seeds. This cucumber probably weighs three or four pounds. It is huge.

Suyo Long cucumber filled with lots of mature seeds which I will save for next year (and share with some friends). This cucumber probably weighs 3 or 4 pounds and is approximately 22 inches long. It is huge.

Happy gardening, folks. And happy Autumn!

New England Garden Journal – September Part 1

Standard

September, oh September, you started off with a fall.

I literally fell on Labor Day. After spending 4 hours in the ER, having a possible surgery scare, I was back home actually excited about pain medication. Chipped elbow bone, small but deep laceration, IV and oral antibiotics, I am muddling through until it heals.

Since I am supposed to keep my right arm immobilized, I haven’t been out to the garden until today. You don’t want to skip three days in a late summer garden. Things can grow really big while you aren’t looking.

Lots and lots of bell peppers. These are my grow bag plants.

Lots and lots of bell peppers. These are my grow bag plants.

Heirloom variety of black beans producing now.

Heirloom variety of black beans producing now.

Suyo Long cucumber escaped its raised bed and climbed the cattle panel fencing. They grow straight when vines are trellised and curved when grown on the ground.

Suyo Long cucumber escaped its raised bed and climbed the cattle panel fencing. They grow straight when vines are trellised and curved when grown on the ground.

My seed cucumber is huge and turning yellow. You can see an immature cucumber growing on the left.

My seed cucumber is huge and turning yellow. You can see an immature cucumber growing on the left.

Dragonfly landed right in front of me and posted for the camera.

Dragonfly landed right in front of me and posed for the camera. I love dragonflies mostly because they can eat their body weight in mosquitoes every day.

The rest of the photos didn’t turn out very well. It isn’t easy taking photos with an arm that I am not supposed to be using. So this will be all this week. I picked, podded and sowed a bunch of snow pea seeds last week which are already germinating. I need to sow some lettuce, spinach and bok choy seeds very soon. The corn is getting fatter, pickling cucumbers are prolific, tomatoes are growing but not ripening yet, and the lemon squash is covered in powdery mildew but producing lots of squash. The zucchini squash in the back yard are producing well, too, with no sign of powdery mildew yet. Here’s to hoping that warm weather continues for at least two more weeks. I want tomatoes and peppers!

New England Garden Journal – August Part 3

Standard

In spite of little rain this summer and sporadic watering, my garden full of heirloom vegetables is thriving. After my very late start, it looks like I will get a decent harvest, albeit later than normal. Now if the warm weather will hang around well into September, I will be a very happy organic gardener. I have over a dozen pickling cucumbers ready to be fermented (pickled naturally), and the Suyo Long cucumbers provide a daily supply that are delicious covered in my fermented garlic dill dip made from organic yogurt (I will share the recipe someday).

Zucchini jungle!

Zucchini jungle!

Sweet corn

Sweet corn forming in spite of the damaged corn patch

Sweet corn growing among Moskovich tomatoes

Sweet corn growing among Moskovich tomatoes

And we have tomatoes, finally. I can't wait to taste my first Moskovich.

And we have tomatoes, finally. I can’t wait to taste my first Moskovich.

Black bean flowers signaling beans in the future.

Black bean flowers signaling beans in the future.

Teensy, weensy baby bell peppers.

Teensy, weensy baby bell peppers.

Two of my three bell pepper plants in grow bags

Two of my three bell pepper plants in grow bags. I hope there is time for a few of them to mature before the first frost.

Cherry tomatoes from the garden volunteers

Cherry tomatoes from the garden volunteers

Terraced bed overgrown with Lemon squash vines

Terraced bed overflowing with Lemon squash vines which are now covered with powdery mildew

Seed saving: cucumbers, tomatoes, lettuce and beans/peas

Standard

Open-pollinated varieties of fruit and vegetable seeds can be saved for replanting at a later date. Saving and sharing seeds has become popular among organic gardeners. Seed savers care about biodiversity and the preservation of varieties of fruits and vegetables that could, without efforts to preserve them, become extinct.

Following are some thoughts on saving cucumbers, tomatoes, lettuce and beans/peas:

Suyo Long Cucumber (or any cucurbit — melon, squash, cucumber)

Suyo Long cucumber will remain in garden long enough to mature for seed saving -- approx. 21" long

Suyo Long cucumber will remain in garden long enough to mature for seed saving — approx. 21″ long

This cucurbit must be left on the vine until it matures. Cucumbers are harvested when they are immature when the intention is to eat them. For seed-saving purposes, the fruit must remain on the vine for a much longer period of time. It is allowed to grow very large and typically turns yellow. I still have a huge, yellow pickling cucumber that I allowed to mature last summer sitting on my kitchen counter. It is filled with mature seeds that I can remove, wash, dry and plant, and I did just that in the spring with another pickling cucumber before planting that variety in June. These plants germinated, have grown well, and are producing perfect pickling cucumbers. This year I am saving Suyo Long cucumber seeds as well as the pickling cucumber seeds. They are growing in different areas of my yard, kept apart for purity of the variety. Pollen from a pickling cucumber could potentially be used to pollinate a Suyo Long cucumber which would result in a mutt cucumber. Not what I want.

How to Save Cucumber Seeds

Mature pickling cucumber harvest last fall compared to a 4-inch pickling cucumber harvested for eating and pickle-making.

Mature pickling cucumber harvest last fall compared to a 4-inch pickling cucumber harvested for eating and pickle-making.

If you have a short growing season as we do in New England, you must allow one or two cucumbers to remain on the vine to mature fairly early in season. You cannot wait until September to choose one or two fruits to allow to mature.

When you allow a cucumber to mature, the plant is signaled that its job of reproducing itself is successful, and that vine will stop producing. You will most likely sacrifice potential cucumbers when you allow a fruit to mature on the vine. Since you can buy a packet of heirloom Suyo Long cucumber seeds for about $4 or less, this might not be financially wise. You must make the choice. Seed savers sacrifice part of their harvest in order to save seeds or plant extra for that purpose.

By saving seeds from cucumber plants that have done well, you are engaging in the practice of adapting seeds to your region, climate and soil. This can be beneficial should you need to grow your own food. I know, that sounds so apocalyptic, but if Monsanto wants to control the world’s food supply, I darn well want to have control over some of the food I eat by adapting seeds to my area, and owning those seeds. I can share those seeds with others, especially community gardens where many people cannot afford to buy $35-50 worth of seeds each spring (and I have done so in the past). Yes, $4 for a packet of cucumber seeds doesn’t sound terribly expensive, but most gardeners grow at least 10 different vegetables in their gardens. That adds up quickly.

Leave the fruit on the vine until the vine dies back or right before your first frost. The plant will become unattractive, the cucumber will look like a monster, but you will have a lot of seeds stored up in the ugly fruit that you can use to grow many more cucumbers next year. You can store the seeds in the mature cucumber over the winter and remove them in late winter giving them time to dry before planting, or you can remove the seeds in the fall and store the seeds over the winter. Your choice.

Some people use the ferment method to separate seeds from the cucumber pulp but I found that unnecessary. I simply placed the seeds in a bowl of water and rubbed the gel substance off of the hard seeds. I then dried them on a plate on the kitchen counter.

How to Save Lettuce Seeds

Amish deer tongue Romaine-type lettuce flowers. The yellow flowers are a food source for pollinators. The bulbous ones with dried flower petals are maturing the seeds within. When they send out a white fluffy material, they are ready for seed harvest.

Amish deer tongue Romaine-type lettuce flowers. The yellow flowers are a food source for pollinators. The bulbous ones with dried flower petals are maturing the seeds within. When they send out a white fluffy material, they are ready for seed harvest.

Saving lettuce seeds is very different from saving cucumber seeds. Lettuce bolts when temperatures get hot enough, sending up a central stalk that will eventually produce flowers. Those flowers will produce seeds. Not terribly complicated. The challenging part is knowing when to harvest the flowers. I had to watch a YouTube video the first year that I saved lettuce seeds so that I knew what to look for and how to get the seeds from the plants so that I could save them for use next season.

Again, your plants will sprawl and grow heavy under the weight of the pollinated flowers. You need to leave them on the plants until you see white fluff. At that point, cut off the bunches of flowers and their white fluff, place them in a paper bag if you don’t have time to deal with them right away, or check one flower to see if the seeds are mature. Pull the flower apart, rub the seed pods, and you should see tiny, hard slivers in black, brown or white depending on the lettuce variety. I have saved seeds from several varieties of lettuce growing in the same bed with success; they seem to bloom at different times allowing for purity. I found that fact fascinating, and wondered if that is why those lettuce varieties have survived for so long.

How to Save Tomato Seeds

Simply remove the seeds from a ripe tomato (no green), place in a jar with a little water, cover with a paper towel or cloth and allow to ferment for 1-3 days. Rinse the seeds well, and then place on a plate to dry.

How to Save Beans and Peas

Sugar snap pea pods drying on the vine in the garden.

Sugar snap pea pods drying on the vine in the garden.

Allow the pods to remain on the plants until the pods turn brown and dry out. If you have a very wet fall, you might need to shelter the plants or hang them in a dry shed to finish drying out. I throw away any moldy-looking seeds and keep only those that look healthy. Peas can turn a yellow color when they dry out. These are perfectly healthy and germinate just as well as the seeds that stay green. But any black or mold spots are grounds for tossing.

Sugar snap peas with tiny black mold spots on them. I will not save these due to the spots and the small pea size. Save the best for seeds.

Sugar snap peas with tiny black mold spots on them. I will not save these due to the spots and the small pea size. Save the best for seeds.


Seed saving takes up space in the garden that you might otherwise use for subsequent plantings and can look very messy. Making provision for these issues is important to seed saving. My garden starts to look very messy around this time as plants overflow into walkways, vines turn brown, and it looks like I am not caring for my garden. Surrendering a bit of the aesthetic is a part of allowing the plant cycle to run its course in my garden each summer and fall. I embrace this time knowing that I am doing my part to preserve biodiversity, will have seeds for next year’s garden and to share with others, and that pollinators have plenty of food at a time when many crops are finished and gardens are cleaned out. It is a trade-off well worth any inconveniences and lack of order.

Will you try seed saving?